العربية
Achieving luscious, fluttery lashes has never been easier with the art of eyelash extensions. If you’re tired of mascara smudges and want a long-lasting solution for captivating eyes, eyelash extensions are the perfect answer. This comprehensive guide will walk you through the process of eyelash extension application, ensuring that you achieve the glamorous look you desire while maintaining the health of your natural lashes.
1. Understanding Eyelash Extensions:
Types of Lashes: Explore the various types of eyelash extensions available, such as synthetic, silk, and mink lashes. Understand the differences in material and how they affect the overall look and feel.
Lengths and Thickness: Learn about the range of lengths and thicknesses available to tailor the extension to your desired style, whether it’s a natural enhancement or a dramatic, voluminous effect.
2. Choosing the Right Professional:
Certifications and Training: Ensure that your lash artist is certified and has undergone proper training. This guarantees that they possess the skills and knowledge required for a safe and effective application.
Salon Hygiene: Verify the cleanliness and hygiene practices of the salon. A sterile and well-maintained environment is crucial to prevent any risk of infection during the application process.
3. Preparing for the Application:
Consultation: Discuss your desired lash look with your lash artist during a consultation. This is the perfect time to communicate any concerns or preferences, ensuring a personalized and satisfactory result.
Pre-Application Care: Follow recommended pre-application care guidelines, which may include avoiding oil-based products and ensuring your lashes are clean and makeup-free.
4. The Application Process:
Step 1: Client Consultation
Initiate the process by delving into a comprehensive consultation. Dive deep into your client’s expectations, preferences, and unique requests. Explore styles, lengths, and thicknesses, ensuring a personalized approach that aligns with their facial features. This foundational step sets the stage for a customized and satisfactory outcome.
Step 2: Preparing the Canvas
Before diving into the application, set the stage with meticulous preparation. Cleanse the natural lashes using a lash cleanser or shampoo, ensuring a makeup and residue-free canvas. This cleansing ritual paves the way for an adhesive bond that’s not only effective but ensures a seamless and enduring application.
Essential Reminders:
- Prioritize the removal of contact lenses to avert potential discomfort and eye complications.
Step 3: Placement of Eye Pads
Delicately position eye pads to shield the lower lashes and prevent any unintended sticking or gluing. Beyond protection, this step contributes to the overall comfort of the client, ensuring a smooth and reassuring experience.
Step 4: Crafting the Map
Tailor the lash look by meticulously selecting lengths, thicknesses, and curls. Utilize lash mapping to strategize the placement of extensions, allowing for a harmonious and desired outcome. This thoughtful planning is the key to a distinct and personalized final look.
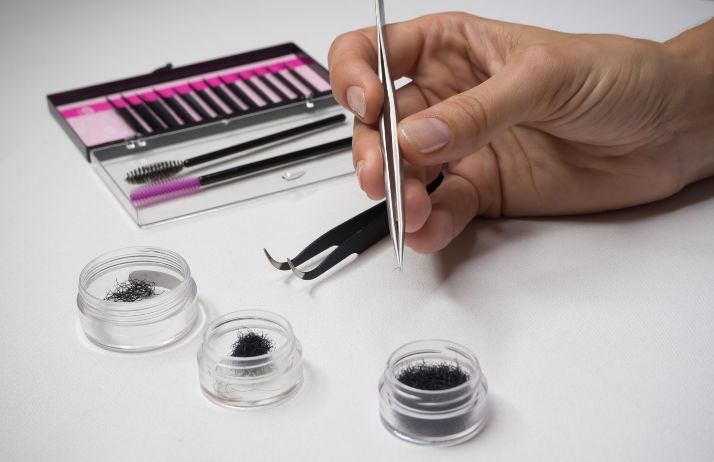
Step 5: Precision Isolation
Employ tweezers judiciously to single out each natural lash. The use of both tweezers simplifies the process, aiding in the positioning and separation of even the tiniest lashes. This precision prevents clumping, contributing to an effortlessly natural appearance.
Step 6: Artful Application
The spotlight is now on the application phase. Utilize lash adhesive to anchor extensions securely, carefully considering the desired length, thickness, and curl. Streamline the application process with the assistance of a small adhesive drop plate, adhesive stone, or glue ring. Dip extensions into the adhesive with precision, avoiding both excess and deficiency for an impeccable result.
Adhesive Dosage Considerations:
- Abundant Glue: This may result in clumping, extended drying time, irritation, and premature bonding.
- Insufficient Glue: This could lead to weak adhesion, extensions not adhering properly, and an uneven overall application.
Allow a brief 3 to 5 minutes for the adhesive to dry, ensuring a robust bond. To expedite bonding and fortify extension longevity, the use of a super bonder is recommended, enhancing both efficiency and the lasting impact of the application.
Step 7: Post-Application Care
The aftermath of the application is equally pivotal. Post-application neglect can lead to premature lash loss and an undesirable appearance. Enforce proper aftercare practices:
- Delicate Cleansing: Regularly clean lashes with a lash extension-friendly cleanser.
- Caution Against Rubbing: Emphasize the avoidance of actions that might dislodge extensions.
- Strategic Brushing: Recommend using a clean mascara wand or spoolie brush for daily combing.
- Steering Clear of Oil-Based Products: Discourage the use of oil-based makeup removers and skincare items.
- Vigilance in Saunas and Steam Rooms: Inform clients about potential heat and moisture impacts.
- Timely Touch-Ups: Remind clients of the necessity for touch-up appointments every 4-6 weeks.
- Professional Removal: Highlight the importance of professional removal to avert potential damage.
Eyelash extensions offer a stunning and low-maintenance solution for achieving beautiful eyes. By understanding the various aspects of the application process, choosing a qualified professional, and following proper aftercare, you can enjoy the allure of longer, fuller lashes without compromising the health of your natural ones. Elevate your beauty routine with the artistry of eyelash extensions, leaving you with a timeless and effortlessly glamorous look.